If you’ve ever wondered why one garden thrives while another struggles, the answer is almost always the same: soil quality.
But here’s what nobody tells beginners: you don’t need to become a soil scientist. You don’t need to memorize N-P-K ratios or debate the merits of hot composting versus cold. You need to build decent dirt that roots can actually breathe in—and you can do that in an afternoon with a bag or two of the right stuff.
Before you plant seeds or buy seedlings, preparing your soil properly will dramatically increase your chances of success. Healthy soil supports root growth, improves drainage, delivers nutrients, and creates the foundation for a productive garden. In this post, we will go over how to prepare garden soil for beginners.
If you’re just getting started with gardening, read our beginner’s guide to starting a small garden first—then come back here to build the dirt that makes it work.
This post contains Amazon affiliate links. As an Amazon Associate, we earn from qualifying purchases at no extra cost to you.
Why Soil Preparation Actually Matters
Plants don’t just sit in soil—they live in it.
Good soil:
- Holds moisture without becoming waterlogged
- Allows roots to grow freely (not fight through concrete-hard clay)
- Contains nutrients plants need to thrive
- Supports beneficial microorganisms that do the actual work
Poor soil leads to:
- Stunted growth (plants stay tiny and sad)
- Yellowing leaves (nutrient lockout)
- Weak root systems that topple in wind
- Low yields (three tomatoes instead of thirty)
Think of soil preparation as setting the stage for everything that follows. Skip it and you’re performing Shakespeare in a parking lot.
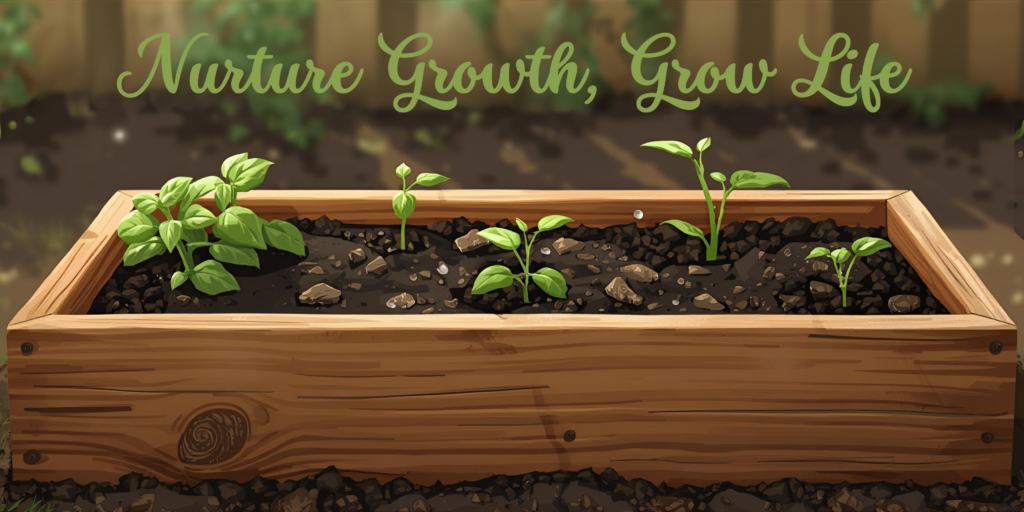
Step 1: Clear and Define Your Garden Area
Start by removing:
- Grass and weeds (roots included—don’t leave weed seeds behind)
- Rocks bigger than your thumb
- Debris, construction leftovers, that weird plastic thing nobody can identify
If you’re converting lawn: Don’t dig up sod unless you enjoy backbreaking labor. Instead, use the lasagna method—layer cardboard over grass, wet it down, pile 6 inches of compost on top, and wait 2-3 months. The grass dies, the cardboard decomposes, you plant directly into the compost. No digging. Your spine thanks you.
For compacted soil: Use a garden fork or border spade to break it up. Loosen 8-12 inches deep so roots can grow downward instead of sideways. If the soil is rock-hard, water lightly the day before—digging damp dirt is easier than chiseling dry concrete.
Step 2: Check Your Soil Type (The 30-Second Test)
Before adding anything, know what you’re working with. This takes 30 seconds and saves you from buying the wrong amendments.
The Squeeze Test
Grab a handful of slightly damp soil and squeeze:
| Result | Soil Type | What It Means |
|---|---|---|
| Tight, sticky ball that holds shape | Clay | Poor drainage, roots suffocate easily |
| Falls apart immediately | Sandy | Drains too fast, nutrients wash away |
| Holds shape but crumbles when poked | Loam | Jackpot. This is what we’re building toward |
The Drainage Test (Worth Doing)
Dig a hole 12 inches deep, fill with water, let drain. Fill again and time it:
- 1-3 hours: Good drainage. You’re in decent shape.
- Drains immediately: Too sandy. You’ll need extra organic matter to hold moisture.
- 4+ hours: Heavy clay. You’ll need both organic matter AND aeration materials (perlite, coarse sand, or vermiculite).
Clay soil? Don’t add sand—it creates concrete. Add organic matter only. Lots of it.
Sandy soil? Organic matter plus a little clay soil if you can source it locally.
Step 3: Add Organic Matter (The Magic Ingredient)
This is the single most important thing you can do. Everything else is details.
Organic matter improves:
- Soil structure (crumbly instead of clumpy or slippery)
- Nutrient availability (makes food accessible to roots)
- Water retention (sandy soil holds moisture, clay soil releases it)
- Microbial life (the invisible workforce that feeds your plants)
What to Actually Buy
For beginners, skip the homemade compost for now. You don’t have any yet. Buy it.
| Product | Best For | My Pick |
|---|---|---|
| All-purpose compost | General improvement, raised beds, containers | Black Gold Natural & Organic Compost—consistent quality, widely available |
| Mushroom compost | Heavy clay soils, vegetable gardens | Organic Mushroom Compost—breaks up clay structure fast |
| Worm castings | Gentle feeding, seed starting, containers | Unco Industries Wiggle Worm Castings—pricey but potent, use sparingly |
| Aged manure | Heavy feeders (tomatoes, squash), in-ground beds | Black Kow Composted Cow Manure—fully composted, won’t burn plants |
How much: Spread 2-3 inches over your bed. For a 4×8 foot raised bed, that’s about 8-12 cubic feet of compost.
👉 My go-to starter mix: Back to the Roots Organic Mushroom Compost—manure-free, smells like earth instead of barnyard, and beginners can’t over-apply it easily.
Step 4: Mix and Loosen (Without Destroying Soil Structure)
Using a garden fork or border spade, mix the organic matter into the top 8-12 inches of native soil.
The rule: Blend and loosen, don’t pulverize. Over-tilling destroys soil structure, kills beneficial fungi, and brings weed seeds to the surface. You’re making a cake, not whipped cream.
For raised beds: Skip the native soil entirely. Fill with:
- 50-60% quality topsoil (not “topsoil” from the parking lot—actual screened loam)
- 30-40% compost (from the options above)
- 10% aeration material if needed: perlite for containers, coarse sand for raised beds in wet climates
Don’t use: Pure bagged “garden soil” in raised beds—too light, doesn’t hold nutrients. Don’t use native soil in containers—too heavy, poor drainage.
Step 5: Level, Water, and Wait
Rake the surface smooth. Water lightly to settle everything. Then wait 1-2 weeks before planting.
I know. You’re excited. You want to plant NOW.
But this resting period allows:
- Microorganisms to colonize and start working
- Organic matter to begin integrating with native soil
- Soil to settle so you don’t plant seeds that end up 2 inches too deep
If you’re short on time: Even 3-4 days is better than planting immediately. At minimum, let it rest over a weekend.
Bonus: Do You Actually Need a Soil Test?
For absolute beginners: No. Not in year one.
Professional soil tests tell you exact pH and nutrient levels, but here’s the truth: adding organic matter fixes 90% of beginner soil problems regardless of what the test says. Compost buffers pH, improves drainage in clay and water retention in sand, and provides slow-release nutrients.
Consider testing in year two if:
- Plants struggled despite your best efforts
- You see specific nutrient deficiencies (purple leaves = phosphorus, yellowing = nitrogen, etc.)
- You’re planting a large in-ground garden (200+ square feet)
Where to test: Your county extension office (affordable, local recommendations) or MySoilTestingKit (mail-in, detailed results, pricier but convenient).
Common Beginner Mistakes (And How to Avoid Them)
| Mistake | Why It Kills Gardens | The Fix |
|---|---|---|
| Planting into compacted soil | Roots can’t penetrate, water pools on surface | Fork it first. Always. |
| Skipping organic matter | Feeding plants in sterile dirt is like feeding humans on vitamin pills alone | 2-3 inches of compost minimum |
| Over-tilling | Destroys soil structure, kills microbes, invites weeds | Mix until blended, not pulverized |
| Ignoring drainage | Roots drown in clay, starve in sand | Do the drainage test, amend accordingly |
| Adding synthetic fertilizer too soon | Burns seedlings, kills soil life, creates dependency | Compost first. Fertilize later if needed. |
| Using “garden soil” in containers | Too dense, no drainage, root rot city | Potting mix only in pots. See our container guide. |
The “I Need This Now” Shopping List
For in-ground beds:
- Garden fork
- Border spade
- Back to the Roots Organic Mushroom Compost — 2-3 bags for small bed
- Wheelbarrow (or beg/borrow one)
For raised bed soil:
- Quality topsoil — bulk delivery for large beds, bags for small
- Back to the Roots Organic Mushroom Compost
- Perlite — 10% of mix
For containers:
- FoxFarm Ocean Forest Potting Soil — skip the mixing, it’s ready to go
- Worm castings — 1 bag top-dresses 10-15 pots
Total investment: $30-80 depending on bed size. Cheaper than replacing dead plants all season.
Final Thoughts: Soil Is a Long Game
Preparing soil properly might not be the most exciting step, but it is the most important one.
When you build healthy soil, everything else becomes easier: planting, watering, feeding, harvesting. Plants forgive your mistakes in good dirt. They magnify them in bad dirt.
Year one: Add compost, plant, observe. Year two: Add more compost, maybe test soil, adjust. Year three: Your soil is alive and improving itself. You just maintain.
Start simple. Improve gradually. Your soil gets better every season—and so do you.
🌱
Ready to choose containers for that perfect soil? Read our guide to 9 essential plant pots for beginners—we match soil types to the right containers so your hard prep work actually pays off.
Happy digging!